

I began with a 6" floral craft ring from www.diybangles.com. It was painted with black metallic acrylic paint (2 coats) and set aside to dry. Next, use a sponge brush to paint silver paint onto bubble wrap. Immediately press the black ring onto the bubble wrap and press. Peel away the bubble wrap to reveal a cool pattern. Set aside to dry.
While the paint was drying, I conditioned a bit of Creative PaperClay and flattened it using an acrylic roller (about 1/8"-1/4" thick). It looked rather plain...AHA, texture!! I found a cool swirly texture in a drawer and pressed it onto the clay. Perfect! Letters were cut using a Wilton Alphabet Cookie Cutter Set (letters are about 2" each). After cutting letters out, I placed them onto a glass tile for baking (Please note: I am NOT a patient person when it comes to creating! Once an idea pops into my head, I MUST get it done! for those who are of the patient sort, you can set the letters aside to airdry [about 24hrs])


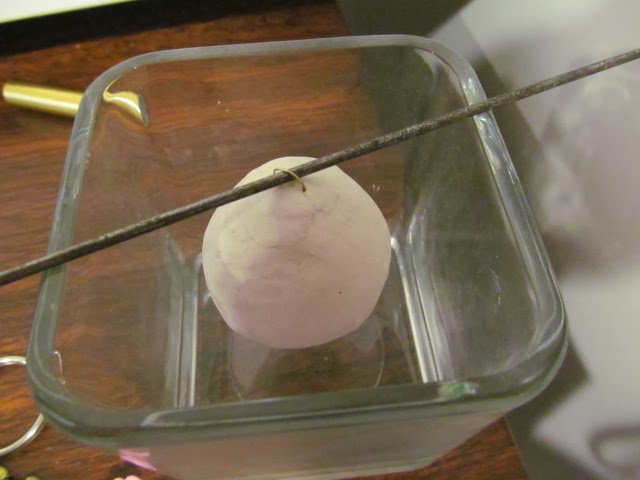
Time to pull out the Delight Air Dry and transform the clay covered ball into a ghost. Roll a large ball (about 1/6th of the package). Begin to flatten with your fingers. Use the acrylic roller and your work surface to enlarge the circle evenly. Once the circle is about 1/8" thick. Drape over the Christmas ball, arranging the ghostly folds as you go. Be sure to press the loop on top through the clay. Create dents for eyes (to be painted when dry). Either hang by loop to dry or prop on a small cookie cutter.
(Note: Delight Air Dry clay is best left to air dry...if put into the oven to dry quickly it will puff)

Create a few Zombie fingers from more Delight Clay. Roll a log for each finger. Use a marker cap to impress fingernails in each. Create knuckle lines by rolling with a needle tool. Use a bit of tacky glue to attach fingers to the painted ring. Let dry in place and then paint/color fingers.
Glue Letters in place with a bit of tacky glue. Paint or ink to color (I used Ancient Page Pine dye inkpad to color this version).


add a screw eye

1 comment:
It appears the final steps aren't listed here? Is there a "part 2" on the way?
Post a Comment