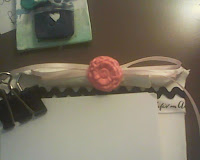
I recycle my printer paper - as I print something out, if it isn't something I need to cut out or use at all, I put it in a file so I can use the backside of the paper for the notes. When I get enough papers, I simply cut them down to 4.25 x 5.5 notepaper size, so when I need a sheet of paper, then I have one available! As I was working on my entire space - I knew I needed something that I could add to that file cabinet, and at least for the moment, will make it look a bit better!
As for the rest of my creative space, I have been recycling a lot of shoe boxes and shipping boxes and putting a lot of my items in them! I can't wait to get the rest of the stuff put together!!!
Supplies needed:
Delight product
Molded flowers
Ribbon
Clip
Paint for flowers
Paint brush
Ruler
Knife or straight edge
Magnet pieces
Hot glue
Directions:
Step one: Flatten out the brick of Delight product.
Step two: Take your ruler and knife or straight edge (I used a smaller ruler) - straighten up the edges of the Delight product.
Step three: Using the pencil - start to roll the top of the product - and the bottom of the product...let dry completely
Step four: Using your favorite flower mold - start to mold the flowers you want to use - using the extra left over from step two. Allow to dry. After flowers are dried, paint them - and allow to finish drying.
Step five: Start to add the ribbon to the top part - and then the bottom part of the creation. At the top of the piece, add the clip for the papers. Make the bows for the bottom as well as the bow for the top. Add the flowers to the middle of the bows.

Step six: Finish off by adding the magnets to the back - I used 3 strip's one at the top, center and bottom of the piece!
I love how this one turned out - much lighter than the other one I made, and really just perfect! My file cabinet will be painted black, and the rest of the space will be black, white, and accent color of pink! I have enjoyed organizing - and creating things with the Delight product! I can't wait to get the rest of the items done that is on my list - and my space finished up!
Thanks for stopping by,
Lynda Jeffs
Memories in Tyme and
2017 Creative Paperclay Design Team


No comments:
Post a Comment